Jack Yoon: Red-White MF Deck won Malaysia Qualifiers with 11 wins.

Hello everyone , Jack Yoon here playing OPCG and GCG in the Asia Region ( Malaysia ).
My socials at X is @JackYoonTCG where I will post my latest decklist and results there.
My dream is to one day qualify for Asia finals and enter the world championship.
I attended my first Gundam Regional Championship in Malaysia (256 players) for the format GD05 and I managed to finish 4th placing in the Swiss round and eventually
emerging champion for the event at the top cut.
I had been main blurple Barbatos for the season GD04 and for GD05 the best deck to pilot is red white MF.
The reason why is it doesn’t have a match up where it is impossible to win if getting the right cards and curve and I had consistently beat NU Gundam unless they high rolled me an early link of rx78 and Amuro breaking base and weenies go through life , but in most of the matches it just doesn’t come so easily.
This is my list for the tournament

However after I participated in the Regional Finals the following day (32 players) I finished the
tournament with a result of 2-3 at Swiss cut and bubble out.
The 3 games that I lost are :
I lost to a high rolled Nu gundam , blurple V strike freedom where he manage to drag to late game with 2 turns of SF link and clear my board , blurple SF where I go for lethal and his last shield was a base.
After that day I went back and tested on MSA and finalised my decklist as follows

What is MF deck and Why I Choose MF?
Of all the options I had for GD05 and the problem with luck based draw in Gundam card game, the only deck that stands out of this norm is the MF deck .
It has ways to cycle away bad cards using commands and also able to retrieve cards and gain resources from trash.
It can repeatedly do the same cycle over and give me the same result in most of the matches I play.
The reason why I shy away from Nu Gundam is because it highly dependant on the Nu Gundam 7c . If you fail to put it on curve and when run out of gas , it is basically just game over with no ways to come back to the game , and honestly

We are done with the aggro meta aren’t we?

MF deck Guide :

Step 1: Mulligan like a pro
The ideal starting hand should be having 1 unit of 2C Gundam Maxter or Michaelis

The second key card you need to look for is the below combo in your starting hand , I would usually keep if I have 1 of the key card plus 2 COMMAND Airframe Seizure or Overflowing Affection.

You need to remember this combo by heart and this is how you control the entire board for the midge

1 UNIT Shining gundam + PILOT Domon Kasshu with COMMAND – Shining finger / Darkness Finger

2 UNIT Rising gundam + COMMAND/PILOT Cyclone Punch
3 UNIT Rising gundam + PILOT Domon Kasshu with COMMAND – Cyclone punch LINK with on board Maxter or COMMAND Shining finger / Darkness Finger

Step 2:
Be aware of whether your opponent is an aggro deck or control deck and the beauty of this deck is it has the two COMMAND card Airframe seizure and
overflowing affection that help me to decide and cycle my hand for the right card to win my opponent.
Key tips for cycling card :
If opponent is aggro deck – CONTROL the board . Find for cards like I mention
for the combo above.
If opponent is control deck – GAIN value and trade for value .To put it in short, use one unit to force opponent to trade 2 unit with you.
Prepare for the MASTER GUNDAM combo with MASTER ASIA

Step 3:
HOW GAIN VALUE ? Or HANDSIZE?
The cycling card is the most important , be aware of your trash , The best card to throw whenever you cycle your hand is the extras you have in your hand.
For example if I have 2 COMMAND Shining Finger I will usually throw it the first card.
ALWAYS throw SPECIAL MOVE COMMAND card because you will always able to draw it back from UNIT Shining Gundam / Aerial Gundam.
Then when your next cycle you need to BUILD YOUR TRASH with MF UNITS .
So that when you drop SHINING GUNDAM you can GAIN VALUE

The reason why I added AERIAL Is because sometimes at the late game , I need the flexibility to draw ANY COMMAND CARD.
WHAT TO PICK ?
If I need to search for WIN CONDITION/ LINK FOR END GAME = Airframe Seizure / Overflowing Affection.
If I need to control board and activate the draw effect of MASTER GUNDAM =

Darkness Finger
If I need to clear board with FIRST STRIKE on Shining Gundam = Shining Finger.
If I need to be prepared for STRIKE FREEDOM / NU GUNDAM hitting my unit and protecting my BIG UNIT = Unforeseen Incident.

To be honest UNFORESEEN INCIDENT is the MVP of this deck . It has won me countless of game.

Try it yourself and for me 1 is enough because the deck is too tight for more cards.

HAOW Gundam – EFFECTIVE against ZEONG tokens / Rush deck that flood the board.

SHINING GUNDAM SUPERMODE
1. For the suppression and also additional link unit for Domon
2. Keep in your hand and clear STRIKE FREEDOM that has 8 FREAKING life when linked.

DOMON 2 AP + SG super mode will total up to 8 attack and can clear a strike freedom with first strike

CONCLUSION

Practice makes perfect. Go to locals and enjoy the game .
GD05 format is one of the best to try out any decks and have fun .
The banlist for vanilla had improve on the entire GCG gameplay significantly and I wish you winning tournaments.

If you have any specific questions can dm me at twitter or X @JackYoonTCG

Ricco K: HOW TO PLAY BLUE – WHITE GUNDAM [GD01 – GD02]

Hi this is Ricco from Indonesia. 

Maybe some of you already know me, or often meet me at Bandai Asia events—especially at One Piece events (yes, because that’s my main focus in playing TCG). A while ago, the Gundam TCG was released, and since I really like Gundam, I started trying to play the Gundam TCG together with my teammates. We exchanged ideas and strategies. Until at one point, I made a decision about which color to start playing with. And my choice fell on blue–white as my favourite color combination, although of course I also play various other colors.
Basic & Core Blue-White.

UW (blue – white) are solid color combination in this game. Very solid for set up game and controlling the field well.  Defensive deck to buying time, so we can get advantage from High End Unit on late game. And then we can take control the game, and win the game.

I always separate play-style to 3 styles:

  1. Aggressive 
  2. Midrange – Tempo 
  3. Control

This UW color is a control deck. Defensive deck with many Blockers to buying time, so you can play High End Unit and turn the table.

Key card:

  1. 12 blocker stapple

Always bring 4 Zowort 4 Lfrith 4 Rick Dias.  

  1. Amuro + Rx78 ST

Combine of best blue pilot and best blue unit, best midgame link unit, to clear enemy’s unit.

  1. Kira + Aile Strike

Kira + Aile is a second best link after Amuro – RX, bounce 1 unit and attack enemy’s unit. Clear 2 unit is a superb counter attack.

  1. A show of resolve

Draw 2 cards, and help us to find what we need. We need 2 – 3 copies in our deck (3 copies = Enough)

Deck Options

I build 3 best UW Deck from GD01 – GD02.

  1. Deck UW SEED (rating: 9 from 10)
  2. Deck UW Epyon (rating: 8 from 10)
  3. Deck UW Aerial (rating: 7.5 from 10)

Note: if you ask about a perfect deck, easily GW WING (easily rating 11/10).

UW SEED (JUSTICE + FREEDOM)

UW SEED is a perfect control deck for me. With couples of RX78-Amuro and Aile-Kira, that’s a strong Link Unit on Midgame, and then Justices and Freedom will take control the field.

Bad matchups:

  1. Blue Green Zaku One Year War (45 – 55)
  • Mulligan to blockers 
  • Starving game. Atk only on enemy unit, no point to atk their life on early game
  • Clear board. Wipe out.
  • Always trade your zowort with zaku 3/2. Useless if u atk on our turn, and then pass turn, and he will ping 1 to our zowort. Enemy get your base and kill your zowort easily,
  • No greedy atk, only atk with non blocker unit, or atk with one unit and then stand it with archangel
  • Final wave attack, only if we sure we want to end game
  1. Blue Purple Barbatos Aggro-ping (40 – 60)
  • Mulligan to blockers 
  • Starving game. Atk only on enemy unit, no point to atk their life on early game
  • Fatal strike will punish your mini blocker, so wisely use your aile strike to block.
  • Always kill the barbatos unit.
  • No greedy atk, only atk with non blocker unit, or atk with one unit and then stand it with archangel
  • Final wave only if we sure we want to end game
  1. Blue White Aerial GD01 (45-55)
  • Keep RX, Aile, Resolve, Justice
  • No need blockers 
  • No atk if not necessary
  • Naval bombardment to kill RX78 or Aile
  • Always drop your archangel to take life. (don’t care bout the basic base)
  • Always target the freedom 1st, their best unit.
  • Justice Gundam back to back will save our day 

Good Matchups:

  1. Green White Wing (55 – 45)
  • U need two blockers on field to kill shenlong, one will KOed by shen’s effect, and then block it plus kill shen with naval bombardment
  • Justice restore your field from WGZ wipe out
  • Justice and token can kill the wgz 5 + 2 (one card solution)
  • Keep your base, because so many breech.
  • Keep your base for extra life, if u cannot handle high manoeuvre, u need your base for extra life
  1. Red White Qube – Sinanju (60 – 40)
  • Naval bombardment to sinanju (must clear from board)
  • Close combat is a terror either from hand or life
  • Ace will punish our big unit, so trade our unit wisely
  • Spam six unit, and we will win. (justice mvp)
  • Always ready for qubeley surprise atk, 2 damage when linked,
  1. Red White SEED (60 – 40)
  • Same strategy with qubeley sinanju.
  • This deck easier than qubeley sinanju.
  • Spam justice and draw 2 cards
  1. Red Blue Ping (60 – 40)
  • We need blocker 
  • Naval bombardment to enemy  rx78
  • Always drop 2/4 blocker
  • Count their trash, and prepare blocker, banshee can kill 2 big bodies cleanly
  • Drop all your unit and blocker, draw 2 later, if u have no unit anymore, play your command to draw.
  1. Red Green Gqux (70 – 30)
  • Mulligan to find rx 78 and aile. (justice is a bonus)
  • Keep your blocker to protect your big body from gqux first strike
  • No need to atk life, clear the board, and u will win.

UW EPYON (EPYON + JUSTICE)

UW Epyon is best unit on late game. The real High End Unit. But depends on early game, ultra defensive game, with 12 Blockers plus 4 Striker Packs. Justice will help us for many matchup (GW and RW matchup). But this deck very very very bad vs agro deck.

Bad matchups:

  1. Blue Green Zaku One Year War (40 – 60)
  • Mulligan to blockers 
  • Starving game. Atk only on enemy unit.
  • Clear board. Wipe out.
  • Always trade your zowort with zaku 3/2. Useless if u atk on our turn, and then pass turn, and he will ping 1 to our zowort. Enemy get your base and kill your zowort easily.
  • Atk only with non-blocker unit, eg: Epyon, Justice, etc. Blocker standby protect your Life and Epyon.
  1. Blue Purple Barbatos Aggro-ping (40 – 60)
  • Same strategy for every aggro game
  • Make sure you have a lot of blocker.
  • Keep naval bombardment to kill rx78.
  1. Blue White Aerial (40-60)
  • Keep: rx78, draw 2, epyon/zech
  • Clear freedom 1st.
  • Naval bombardment to RX or Aile Strike.
  • Epyon must try to kill 2 big bodies.
  1. Mirror (50-50)
  • Rest or atk with your unit wisely.
  • Try to not block the epyon, kill epyon on our turn (that’s why u must atk wisely)
  • Use blocker to protect Epyon.
  • Draw is everything, more Epyon Link on field = bigger winning chance.

Good Matchups:

  1. Green White Wing (55 – 45)
  • Play around with Shenlong unit, keep naval bombardment to kill shenlong.
  • Striker pack 4/2 when your opponent resource still 4 – 6, when 7 above choose 2/4.
  • Striker pack 4/2 + naval bombardment can kill gundam wing breech.
  • Starving Game on early game, no need atk, atk only for trade unit with your opponent.
  • Justice to stabilise board with 2 bodies.
  1. Red White Qubeley – Sinanju (60 – 40)
  • Play around from close combat
  • Keep your blocker from qubeley double damage.
  • No need zowort, easy to die
  • Striker pack always choose 2/4
  • Clear sinanju from the field
  • Justice Gundam = MVP (6 board full and u will win)
  1. Red White SEED (60 – 40)
  • Same strategy for RW games.
  • Keep hand: Draw 2, RX 78, aile strike, epyon/zech
  • Justice Gundam give your opponent many homeworks.
  1. Red Blue Ping (55 – 45)
  • Strategy of aggro midrange game
  • Keep spamming blocker for early game
  • Striker pack always 2/4
  • Play around from banshee game
  1. Red Green Gqux (70 – 30)
  • Play around from Gqux first strike.
  • Keep and use your blocker wisely, don’t let them trade your big body unit.

UW AERIAL REBUILD (AERIAL GD01)

UW AERIAL is ultimate tactical deck, very hard to play this deck. But combo RX and Aile on midgame plus minion blockers make this deck very strong to defence agro deck. The plan is pairing all of your unit with pilots, and trade some of them with enemy strong unit. We can draw 2 cards, and then play aerial to take back your Command from trash. While your enemy have no draw mechanism, and running out gass. Bring many pilots (11 -12 pilots) sometimes will be a good thing, but yeah u know, in another hand, if you draw many pilots, but no unit on hand will be useless.

Bad matchups:

  1. Blue Green Zaku One Year War (40 – 60)
  • Aggro strategy applied. 
  • Focus clear opponent  field
  • Blocker is everything
  1. Blue Purple Barbatos Aggro-ping (40 – 60)
  • Aggro strategy applied
  • Rx 78 is very important to clear area.
  • Keep you aile strike healthy (play around from fatal strike)

Good Matchups:

  1. Green White Wing (55 – 45)
  • Play around with Shenlong (naval bombardment strategy)
  • Draw is everything
  • Keep your base for extra life.
  • Freedom will win your game
  1. Red White Qubeley – Sinanju (60 – 40)
  • Play around from qubeley
  • Kill the sinanju
  • Draw is everything
  • Freedom must block wisely, don’t let your opponent KO your freedom
  1. Red White SEED (60 – 40)
  • Same strategy for Rw games.
  • Aerial + show of resolve will win the game.
  • Opponent’s justice will make us busy.
  1. Red Blue Ping (55 – 45)
  • Spamming big blocker and u will win
  • Keep aile strike & freedom
  • Keep big defence blocker, so cannot dead by ping easily.
  • The player who get more draw 2 will win.
  1. Red Green Gqux (70 – 30)
  • Play around from Gqux first strike.
  • Keep and use your blocker wisely, don’t let them trade your big body unit.

Tips and Tricks:

  1. Always play 1st
  2. If u got 2nd, justice gundam is a good answer
  3. Do Starving Game strategy.
  4. Focus on clear opponent board
  5. Life later
  6. Do naval bombardment wisely 
  7. No necessary atk, play safe first, always compare total opp’s attacker with our blockers.
  8. Play around vs high manoeuvres = keep base for extra life.

This article is the result of our team’s practice and experiments. Of course, what I’ve written isn’t necessarily 100% accurate. I hope this article can help you gain a better understanding of playing the blue-white deck.

Best Regards,

Ricco Kurniawan

[FB03] Marlon with Jiren: 1st Place TAK AUCKLAND Regional

Introduction

Hello everyone! My name is Marlon, and I recently placed 1st at the Auckland Regional over the weekend. Before I dive in, I’d like to thank TCGTopDecks for giving me the opportunity to write this article about my deck of choice, Jiren.

In this article, I'll explain why I chose Jiren, break down my matchups, and walk you through the key decisions that led me to victory.

Click into the image for decklist in TCG Top Decks

Why I chose Jiren

The reason I picked Jiren is actually pretty simple—I just thought he was a cool character in the show! When FB03 was released, it was an easy decision to choose him as my leader. Fortunately, Jiren turned out to be one of the most fun decks I’ve ever piloted in any TCG. Every game I played with him was more about having fun than worrying about winning or losing, and I believe that mindset played a big part in my success during the tournament.

Card selection:

Jiren:

The most obnoxious card I've ever seen. Take Life, Replace life, Draw a card from Leader, oh and their attack also gets negated!!

Rumsshi:

This was the MVP when facing blue. Being able to On Play KO any of their 30000 or less felt so good. Goodbye Vegitos and Gohans.

Double Attack Goku + Marcarita:

Whenever you’re looking to close out a game this duo will never let you down. Double Attack AND offensive super combo for 1c is insane to me. Only once did I charge this card early because I had 2 other copies in my hand, otherwise I will hold this card until the end of the game to secure the win.

Matchups:

During the event, I only faced two different decks across the seven rounds: Androids and Blue Vegeta.

  • Round 1: Androids
  • Round 2: Blue Vegeta
  • Round 3: Blue Vegeta
  • Round 4: Blue Vegeta
  • Round 5: Androids
  • Round 6: Androids
  • Round 7: Androids

It was a bit surprising to have such a repetitive matchup pool, but sometimes that’s just how tournaments go!

Versus Androids:

My game plan was to awaken as quickly as possible using cards like Hit, Gohan, Caulifla, and even Jiren. Once I awakened, the strategy became straightforward: flood the board with as many Jirens as possible and push for the win.

Versus Vegeta (Blue):

Admittedly, this was my first time facing Blue while piloting Jiren. Going into the matchup, I had a solid understanding of what Blue does as a color and the key interactions to watch out for.

Before facing Vegeta, I was advised to always take the second turn, focus on playing my 5-cost units, and charge Jiren whenever I had the chance.

My three games against Blue played out in a similar fashion: I focused on protecting my life early, played cards that negated reduction effects to maintain control of the board, and then deployed my 5-cost units. In two out of the three games, I closed things out with Goku or Marcarita to secure the win.

Final Thoughts:

I still believe I had a bit of a lucky run, facing Androids in 4 out of the 7 rounds, but sometimes a little luck is all you need in TCGs.

I’d also like to give a special thanks to two players who gave me valuable advice during the event: Max (@MyBaeGengar on Twitter) and Jiawei, the only other Jiren player at the event who also made it into the top 16.

Thank you all for reading! If you have any questions, feel free to reach out to me on Twitter @crymeeeee.

[FB03] Benjamin: Android made 1st place in Carta Magic Regional

Introduction

Hi everyone ! I'm Benjamin and French living in Montréal, I'm a dragonball fusion player. Firstly, I would like to thank TCG Top Decks for giving me the honor to provide an article on my recent 1st place at Niagara Regionals with 96 players. I'll tell you how to pilot my deck. And how to make the best possible decisions.

Click into the image for decklist on tcgtopdecks-hq.com

Deck Profile

For me, Android is a versatile deck and it can be played slowly as well as speeding up the game. Its weak point is the red decks. The hardest part is getting through the mid-game. You have to make the right decisions and know how to defend your hit points… 

You have a fair chance against all decks. It really depends on your opponent, your draw and your mistakes. It's an easy deck to pilot, try to save as many of your life points as you can, increase your energy as much as you can, try to get a board before you attack, and try to clear the enemy board as much as you can. You have to be patient with this deck. I think that's the key to winning.

Card selection

If you have these 3 cards in your starting hand, it's the best hand to start the game.

Android 20 will be used to defend you, and having an android in your drop will increase your energies.

Krilin will help you get destructive strength if you don't already have it. If you don't, you can advance by picking up an android 18. Krilin also allows you to attack and temporize in the face of critical blows: you'll attack, then your opponent will generally defend, and on his turn he'll want to redirect his attacks onto him, which allows you to defend your leader from an attack.

Destructive Strength on turn 3, you either save the remaining energy for gigantic meteor, or use it to draw, and have a 5k to defend.

This card is very important. It's the winning condition vs black deck. Try to have it in your starting hand. You need to counter the secret goku who cost 4. They have 2 choices: first, they'll try to put it down and you'll gain time to get to the late game, or they will play aggressively and won't have enough cards in hand to compete with you. 

Against red decks, it's the same story, with Jiren battle card which costs 4, Don't let him draw, it will be hard for him to awaken because you don't want to play aggressive in early game. 

Against blue decks, this card has also served me well against the secret Vegito. It slows down the opponent's game, while my energy always increases.

The best card of this deck, use it when you can for up Energy, like turn 4/5. You can in late game when you have 9 Energy, don't put an Energy, keep cards in your hand and use this card to earn Energy from your drop, it's free. It's important to have maximum cards in your hand.

Tournament Matchups

Round 1 vs Bardock (alexander jankowski): I managed his board well and didn't draw too much, so I took the lead.

Round 2 vs blue Vegeta (Kyle Brunori): He doesn't play aggressively enough, and I put too much pressure on him at the end of the game.

Round 3 vs Android (Nick R): I take the advantage on the board but I think this is my tightest match, I make a final attack and he lacks 5k to defend, otherwise I'd lose on the next turn.

Round 4 vs Bardock (Eric Pye): He defends a Pan battle card that's no use to him, I empty his hand easily and take the lead, it's his miss play and he won't be back in the game.

Round 5 vs Zamasu (Danny Phongsavath): Recorded game I didn't know what to expect, I think he's got miss play by defending with super combos at the start of the game that won't help him at the end, and I'm not putting too many cards in play because of Zeno.

Round 6 vs blue Vegeta (Anthony Giu): He doesn't put enough pressure on me, I'm going to the endgame he can't defend.

Round 7 vs Son Gohan (Alexandr Golubev): Recorded game I start with the idea that I've got the matchup, and I was right: his green deck is too slow for me, so I counter it.

Final Thoughts

Thank you to the organization of this event, carta magica, judges, all people who participated in this event, all the players I met there and my opponents. Everyone was really cool. I love this community and hope the game continues to grow!

I would like to thank TCG Top Decks HQ for the honour to write this article, and thank you everyone who has read till this point!

[FB03] John: 1st Place OCE Regional with Black Bardock Deck

Introduction

Hey everyone, my name is John and I am a Dragon Ball Masters/Fusion World player from the OCE region! Over this past weekend I was able to Pilot a deck that me and a few of my teammates on PX3 (Max Kennedy, Indi Watts and Kevin Nayda) had theory crafted to a First place finish at the Regional. This is my first time doing a written article like this so I will do my best to go over everything in as much detail as possible!

Click into the image for decklist on tcgtopdecks-hq.com

Bardock VS Goku

So a big question that everyone had asked once they saw what deck we were playing is, why Bardock over Goku?

At a glance the Goku leader looks much stronger then the Bardock, and although that is true there is one massive difference between the 2 leaders, Bardock is able to do its abilities for free while Goku must always spend 1 energy to do so and with how fusion world plays out, you are most likely using your energy to do other things throughout the course of your turn that using your leader skill will hinder what you are able to do.

Whereas Bardock will be able to attack your opponent’s leader every turn for 25000 power, which allows him to naturally attack into bigger bodies or demand a 10000 combo card from your opponent on defence. And that’s not the only part, the active battle on him is also Deceptive, a lot of people think you are force to run more of the Bardocks Crew Arctype to synergise with this ability where it is not the case. The Ability to use this on a battle card swing to see the next card you will draw into is huge, if the card is something you do not want, you can place it at the bottom of your deck and draw into something else. This extra layer of filtering was what led us to our success over the weekend as we were playing a more successful deck.

What’s more, we do still run some Bardocks Crew cards in the deck, so if we are lucky and hit the 10k Combo Borgos we run, we get a FREE 10k boost in power on any of our cards attacks, which is the same power that the Goku Leader Provides.

Card Selection – The Big 4

The Son Goku:GT Secret Rare is currently the Best card in the game in my opinion. This card is able to create a free energy and a draw a card every single turn that it is on the board for, if your opponent is unable to clear this card the turn it is played and you are able to establish 2 of them at once, you have most likely won the game. Your game plan against Majority of Matchups is to play this card on Turn 3 using the Energy marker and let it snow ball the game. 

To go alongside the best card in the game, we have the best double striker in the game, Bardock is out finisher as it does have the double strike skill, but the main focus of this card is the fact that it is our best removal, during our turn we are able to combo 2 cards and KO anything, not only is the fact it isn’t restricted to any cost of battle cards, it also isn’t a On Play skill so we are able to keep on reusing this skill each turn he lives which once again provides insane value. The combo effect might be a little taxing but we run plenty of 1 drops to facilitate it plus it can work naturally from our leader skill. 

This Bardock is our main aggressive card, the ability to attack twice with 1 body is what yellow wishes it could do, and again this skill isn’t limited to the turn you play it, so the longer this Bardock remains on the field the better he becomes. Against green and yellow it is a powerful strategy to play this on your turn 2 using the energy marker and just keep on attacking them as they do not have good removal for it until later parts of the game. 

By now you should be noticing a theme amongst the best cards in Black as all of them have effects that keep on generating value each turn they live on the board. Pan is also useful as she can not only be a card that lets us awaken quicker, she is our primary source of removal for any 4 cost Battle cards until we get to Bardock 5 Drop, this card is essential in the Black mirror as it is the best answer to our opponents Secret Rare. It is also very important vs Jiren as it allows us to Out their 4 Drop Jiren efficiently as it returns the card to our opponents hand. Not only is it this form of removal, it also just draws a card each turn it survives on the board. These are the 4 Best Cards in Black.

Card Selection – The Essentials

Every Deck should be running 4 Super Combos, cards are the corner stone of defence!

1 Drop draw cards are very powerful in fusion world, being able to dig deeper into our deck as well as being able to combo on defence is always impactful, they also can be used on offensive combo to synergise with both of our Bardock Battle cards. Fasha is also a Bardocks Crew Battle card which also synergises nicely with our leader skill.

These are our 2 ways to create an energy going first. Kakarot is essential for going first as if we are able to see it in our first 2 turns, we will able to play our Secret rare on turn 3 going first which not many decks can keep up with, black included! The 3 Drop Goku is just an ok card, it is needed though as if we do go first and do not see Kakarot it does enable us to create a marker, taking the Life is also nice but again just ok. Once you do have the energy marker he can be seen as a 2 Drop 25k attacker which is technically over stated but he is not as impactful as the other SR’s in the deck.

Card Selection – Tech Options

Black has some power Tech options, Giru is Black’s Kami. Being able to take out opposing 1 drops is nice and it also is a 10k combo card, if your tech card is as worse 10k combo, it is insanely Strong! 10 x Kamehameha is also an insane card. If you used the marker to activate its cost you are able to KO 2 3 drops! That is such an insane card as we are trading 1 energy for potentially 6 energy worth of cards.

The Para Para Brothers is an interesting card. This card is able to buy you some time preventing big threats you aren’t able to deal with from attacking, keep in mind it is only a Band-Aid fix, the card will still be there for you to deal with on later turns. 

Hercule is another really cool card, it is Black’s balanced version of Pilaf, being able to grab any of the 1 drops in the deck for 1 energy is huge. It allows us to get away with running lower ratios of our tech options while also having access to more copies of them. An underrated thing about this card is its ability to grab back our 10 x Kamehameha for even more removal. 

Borgos is currently the best 10k combo Bardocks crew card, it being a 1 drop allows us to grab it back on Hercule and it can serve as a cheap attacker since 15k only require 1 10k combo card to pressure our opponents leader. Feel free to include more Bardocks Crew cards if you like but they are not required for the deck as black has so many powerful cards!

Final Thoughts

Thanks for making it this far! Like I said I do not normally do written articles like this but thanks for TCG Top Decks for this opportunity.

If you are curious to learn more about Fusion world from me feel free to just message me on either Facebook or Twitter (@TruePyroShad) and stay Subscribed to the Team I am currently on (Px3) for future content, until next time guys!

[FB03] Majin: Blue Zamasu Deck Profile.

Introduction

Hello everyone, I’m Majin (https://www.youtube.com/@M4J1N), an Italian content creator and competitive player in Dragon Ball Fusion World! I recently won the latest Store Battle in my area, which had 18 participants, finishing with a 5-0 record using a leader that I believe is highly underrated in the current meta: Zamasu.

My pairings were: Round 1 against Son Goku FB03, Round 2 against 17/18 FB01, Round 3 against Jiren FB03, Round 4 against Beerus FB01, and finally, Round 5 again against Son Goku FB03.

In this article, I want to explain why I chose Zamasu as my leader and why I consider him a potentially excellent choice in FB03!

Click into the image for decklist on tcgtopdecks-hq.com

Why Zamasu?

Zamasu has been one of my favorite leaders in FB02 until the arrival of the banlist. He was one of the few capable of standing against TopKu, but unfortunately, with the rise of Android in FB2.5, I had to bench him—until now.

Zamasu’s deck type is pure control: once the leader is awakened, he becomes a 25k, and like all 25k leaders, he loses the ability to draw cards. However, thanks to some cards introduced in FB03, like Son Goten or Videl, this issue is almost entirely resolved. In fact, these cards allow you to reach the late game with an incredible advantage compared to most other decks.

Typically, I tend to drop to 3 life points as late as possible, around 6-7 energy, before starting to play cost 6 cards like Zen-Oh to completely reset the opponent's board, followed by Goku Black to apply pressure and recover important cards from the drop.

Now, let's look at the pros and cons:

Pros

  • Being a base 25k once awakened allows you to block your opponent’s 30k attacks (which are quite common in this meta) with just one card. It makes it difficult for opposing leaders to attack you directly, as they would need to invest resources. Consequently, it’s also harder to defend against when you attack.
  • The leader’s skill in the late game gives you the option to absorb the opponent’s last attack, or their biggest attack, and then recover that life in the next turn simply by investing one energy and a card from your hand. Energy in the late game will never be a problem, and cards can be easily recovered from the drop. Your opponent will need to continually invest resources to try to deal damage while also dealing with an increasingly dangerous board that generates cards and combo value constantly. Meanwhile, you can safely chip away at the opposing leader’s life, one point at a time. To secure the win, your opponent would need to eliminate 3 life points in a single turn; otherwise, you’ll keep recovering them.
  • Blue is generally limited by the 7-card hand limit, so it has many ways to recover cards from the drop. By prolonging the match as long as possible and relying on small recovery plays and board control rather than always playing the biggest card in your hand, as many other decks do, you’ll maintain card advantage and put your opponent in a difficult position as they will have fewer and fewer cards each turn.

Cons

  • I believe the worst matchup for Zamasu is Android. It’s not impossible to win, but it is quite challenging. Fortunately, Android is almost a free win for Jiren, so there are fewer of them than before. Other green leaders, however, are quite manageable.

Key Cards:

Here’s a list of the most important cards in the deck:

  • Zen-Oh is devastating for practically any opponent! If you don’t have Goku Black on the field, you can play Zen-Oh without hesitation to reset both players’ boards. After that, you can either use Zen-Oh to attack the opposing leader or keep him as a 10k combo value for defense in the next turn.
  • Goku Black is your boss monster par excellence. Upon entering the field, you can recover any card, including extra cards, from the drop as long as it costs 4 or less. Then, on attack, he allows you to play a Battle Card costing 4 or less from your hand. The two main targets are always Fused Zamasu 4c and Gotenks 4c, both of which can generate extra cards.
  • Vegeta FB03 is a great addition for the green matchup and against the meta in general, as no one likes taking Critical damage. His presence guarantees discarded cards for your opponent and diverts attacks in the next turn.
    PS: Never take life with him; it’s not worth it!
  • Sinister Sickle and Absolute Lightning are crucial for board control. Once you reach 9 energy, it’s not uncommon to recover them with Goku Black and use them in the same turn. Additionally, Sinister Sickle in combination with Mai FB02 helps deal with potential 5-cost Double Strikes.
  • Videl FB03 and Son Goten FB03 are other additions that will help you cycle cards from the drop and draw more. Additionally, Goten synergizes excellently with Gotenks. Once on the board, besides giving you an extra card, he can also be used to attack the opposing leader pre-awaken.

Matchups

As mentioned earlier, during the tournament, I faced 2 DeadKu, Android, Jiren, and Beerus:

  • DeadKu is generally a favorable matchup. Unlike other blue leaders, it wants to awaken quickly, which works to our advantage. Moreover, the more classic builds struggle to deal with Goku Black, often requiring an entire turn and 2 Hercule and Gohan 4c to remove him. Their board is always filled with small but essential pieces for the deck’s economy, making Zen-Oh even more devastating than usual as it forces them to start from scratch. It’s not guaranteed that they’ll have the cards in hand to do so, as the fields they draw after the first one often end up in their energy.
  • Android is, as already mentioned, a tough matchup if it gets a good start. It will play big pieces that are hard to deal with using Sinister Sickle. You’ll need to hope to see as many Vegeta 2c as possible to make them waste resources and redirect attacks to Vegeta instead of the leader. Fused Zamasu is also very useful in this matchup due to green’s difficulty in removing him. The other crucial cards, of course, are the 4 Zen-Oh and 2 Absolute Lightning!
  • Jiren is another favorable matchup, in my opinion, because he wants to close the game as quickly as possible. However, due to Zamasu’s playstyle, it won’t be easy, as we usually defend against all early attacks directed at the leader. The 4-cost Jirens are easily removable, and against blue, they often end up being charged into energy. Once awakened, the only way for Jiren to draw cards is through 1-drops, while we will consistently have 6 to 8 cards in hand.
  • Beerus can be problematic due to Critical damage, so it will be essential to cycle 10ks for defense or leave one energy for Galick Gun. Again, Vegeta 2c is crucial for the early game since pre-awaken Beerus cannot draw, making Critical pressure very uncomfortable. Additionally, Beerus will be forced to attack with his Battle Cards, allowing us to use Zamasu and non-Critical Battle Cards to attack his pieces and keep him from awakening for as long as possible.

Final Thoughts

Overall, from this tournament and various tests, I find that Zamasu is an excellent Meta Call for the FB03 meta, where almost all decks rely primarily on 4/5-cost Battle Cards that are easily removable with our Extra cards. Additionally, green is much less common due to the extreme difficulty it has against Jiren.

I didn’t encounter any black leaders during the tournament, but based on tests, I can tell you that the matchup is, at worst, a 50/50, as black also focuses heavily on 4-cost cards like Goku: GT SCR. Perhaps to better prepare against Goku: GT and Bardock, you could increase the number of Sinister Sickle by 1 or 2 to guarantee seeing them when needed.

Thank you all for reading! I hope I’ve been clear and thorough in explaining every decision and choice I made.

Thanks also to TCG Top Decks for giving me this opportunity to perhaps make you reconsider a leader that I’ve always seen ranked at the lower end of most of the new Tier Lists.

Finally, thanks to Hunter Games and all its top-level players—practicing with you is like training in the Tiger’s Den!

Keep following me on my YouTube channel (https://www.youtube.com/@M4J1N) for updates and new deck lists!

[FB03] Taminator (SG): Introduce the Jiren Red Deck that won the Ultimate Battle.

Introduction

Hello! I Tam (Twitter: @Taminat0r_) from Singapore, and I have topped both the Ultimate Battles my country had in the FB03 Meta. Firstly, I would like to thank TCG Top Decks for giving me the honor to provide an article on my recent 1st place achievement in 1Collectibles Ultimate Battle. In the following, I will be giving an introduction to Jiren as a leader, and identifying its pros and cons of the deck. I’ll also be highlighting some edge cards, and what to mulligan for.

Click into the image for decklist on tcgtopdecks-hq.com

Deck Profile

Jiren is a midrange deck, that has good hand size, and sits at a strong 25k base. The general playstyle of the deck is to play to your energy curve, while establishing board presence of strong units such as the new 4 cost SR Jiren and your other big units.

I like to awaken fast, usually by turn 4, so I can immediately park down my 4 cost Jiren for my opponent to deal with. The main aim of the deck is to be able to out value your opponents with the 4 cost Jiren’s interaction with the leader, in allowing you you to draw 1 from your Jiren leader, character, while negating an attack due to the effect interaction. With a built up hand size, and playing into the 7 energy turn, it allows you to effectively call down your 5 cost Double Strike Goku, while slamming down 2 1 cost Marcarita and going all in with extreme power!

I would consider Jiren as a Tier S character to pick into the new competitive environment due to the decks well roundedness. As much as it is a strong character, there are a few Pros and Cons of Jiren which I will be listing.

Pros:
1. 25k Base
Sitting on the base, allows you to require a reduction in combo power, resulting in less resources to defend, and it also grants you a slightly more offensive power in pressuring. Opponents' Leader would require additional combo resources from their hand or board to touch you. 

2. Interaction with 4 Cost Jiren
As mentioned, the interaction with 4 cost Jiren is extremely powerful, especially against decks that are not Blue. The card is sticky, and provides a strong 30k body which allows you to push hard into your opponents. 4c Jiren allows you to trigger your leader’s ability, allowing you to draw during your opponents turn. Most important interaction is that as you only choose to trigger 4 cost Jiren’s effect after entering battle phase, due to the awakened leader’s ability, it allows you to negate the attack, as you have already taken damage from 4 cost Jiren. This sick interaction provides an immense value especially if your opponents cannot clear it!

Cons:
1. Inability to Draw once awakened
The inability to draw once awakened similar to Broly when attacking is a disadvantage for the deck. However, with a 25k base, of course the deck has to receive some shortfalls if not it’ll be way too broken.

2. Over Reliance on 4 Cost Jiren
To add on to point 1, you essentially are not drawing once you are awakened, so the deck requires a strong emphasis on having 4 Cost Jiren stick. Against decks that can comfortably remove your Jiren such as Blue, you would definitely have a hard time.

Key Cards:
These key cards mentioned are in no particular level of importance, but rather crucial to your game plan

1. Jiren
Jiren is a 4 cost 30k body which is extremely strong due to its sticky nature. It heavily benefits Jiren leader due its ability to enable you to trigger your leader’s ability, in letting you draw 2 cards during your opponent turns. It also trigger Jiren’s ability in Negating an attack, especially useful against Big Attackers such as Broly!

2. Double Break Goku FS01-08
The 5 Cost double break goku is essentially your winning condition, as well as your trump card! It provides a powerful -20k, but most importantly its Double break! This card is also an edge in the Mirror matchup, as if your opponent only has 1 30k and above body on their field, you can -20k to that unit, and shutting off their Jiren’s ability

3. Marcarita FB03-022
Marcarita is a really strong push cards that helps buff up your 5 Cost Goku during your push turn! It increased you ultimate power output, and it has won me a lot of games both in pushing my opponent to 2 life, as well as finishing them off!

4. 2 Cost Caulifla FB02-007
This card enables you to rush awaken, which is crucial for Jiren in most matchups. The critical ability is especially important in putting in the early game pressure for decks such as Android which is another one of the strongest deck in the meta.

Tournament Matchups

During the Ultimate Battle, I played against Trunks, Dead Ku, and 2 Androids.

Round 1 Dead Goku:
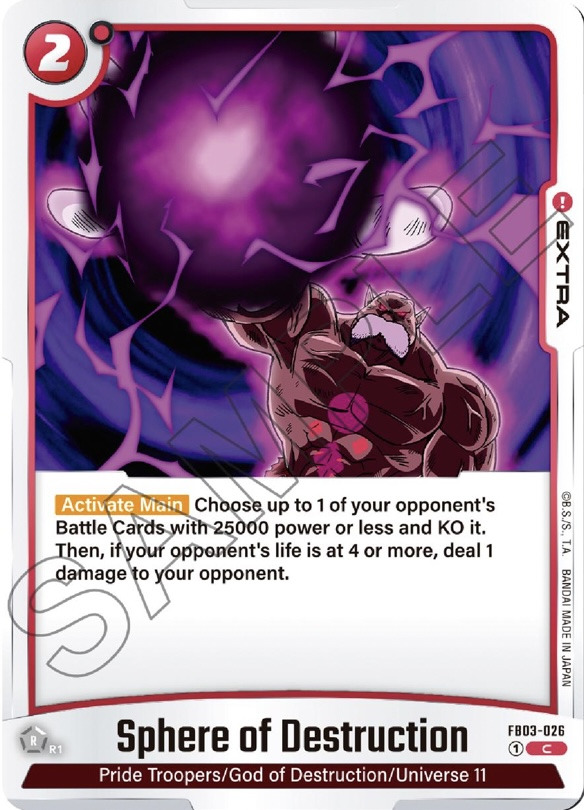
I went Second, and I hard mulligan for Sphere of Destruction and Toppo. With these 2 cards, I was effectively able to remove their 3 cost Vegito which is crucial for their gameplay, thus resulting in them to be unable to deal with my big drops, and eventually winning the game by an inch.

Round 2 Trunks:
I went first, and I started with Sphere of Destruction, and similarly, I was able to remove their Vegito, and they were unable to develop another vegito, thus unable to remove my big drops. My opponent had a hand size of 10 cards during their awakening turn due to the effect of shooting 1 damage resulting in them to have to play really awkwardly on their turn 4. I eventually stalled out to turn 7 and was able to all in him with Double Strike Goku and 2 Marcarita. With 7 handsize, it was tough for him to block my all in.

Round 3 Android:
Went Second this round, and was able to coin out 2 Jiren. As the meta was new, my opponent was unsure of the new interactions, thus he ignored my first Jiren. By safety parking 2 Jiren down, the game was pretty much set due to the insane value generated from both Jiren.

Round 4 [Finals] Android:
Went first, and started with the best hand against Android. I played down 2 Caulifla on both turn 2 and 3. I am not sure why he guarded early, and when he awakened, he had only 5 hand card from what I recalled. He missed his 3 mana Ramp which was really painful for him.

Final Thoughts

I hope this short article can provide you guys with a base insight on what Jiren does, and its general game plan. This decklist was used on the second day of release, so there are a few changes made prior to now.

Do follow my Twitter/X @Taminat0r_ for more deck lists and updates. If you have any questions or feedback on my article you can feel free to message me on Twitter/X, as this is my first short article, so please pardon me if there are any mistakes. I will also be considering to do a more in depth note on both Jiren and Beerus, where I will explain how to navigate the different matchups so do keep a look out!

I will like to have big shout out to my competitive playgroup, who have been testing with me at the best local game store @CaeserCards! Most of their names should be familiar as they are well-decorated players in both One Piece TCG as well as Dragon Ball Fusion World, so please hit them up, as some of them do coaching for both games!

Play Group Members
Shun (@Level100_Evee)
Glen
Alfred (@AlfredOnePie)
Tee (@SFKTeeHanYong)
Jeremy (@JellybeansOP)
Kai (@ahkaionepi)
Ben (@PBJOnePi)
Daven (@JPYP_)
Gavriel (@CaesarCards)

Once again, I would like to thank TCG Top Decks HQ for this honour to write this article, and thank you everyone who have read till this point!

[FB03] Elliot: Black Deck SonGoku GT made top-8 Oceania Regional

Introduction

Hello! My name is Elliot, and I am a Professional One Piece TCG Player from Australia. I have recently started competing in Dragon Ball, and I am from team Eternal Magic. In previous formats I have played Broly, Beerus, and Frieza as my main decks, however for this tournament I believe Black to be the best color in Dragon Ball. Thanks to my testing partners who also did very well (John who won, Max who came third, and Kevin who came 11th) who showed me how insane the deck is!

With my limited testing before the Perth regional, I decided I would play GT Goku. I expected that I would encounter some Red matchups, which the leader counters due to the ability to protect your characters from power based KO effects and attacks.

For example, we can defend our Pan versus Jiren so they cannot stick a 4c to the field, and protect our 4c Goku versus Beerus so he cannot be KO’d by Rumshi.

Bardock is the better leader across the board, however it may be slightly weaker into Beerus, which will make me re-evaluate the pros and cons for the next tournament.

Click into the image for decklist on tcgtopdecks-hq.com

Deck Profile

For my deck, I ran a very simple and straightforward list aimed at beating the mirror and blue. Some decks run Pan GT, however I feel the whiff rate on this build is too high, and some slots that are included are simply weaker than the standard cards you would cut (Giru, Para Para, Cantrips, Hercule).

Most of these cards are extremely playable 10k combo cards, and being able to lock on-attack cards is game breaking versus every deck. These cards are also amazing as we generally play them early and use them to fuel our 3c and 5c Bardock’s on combo effects. The main flex spot of the deck I have put in is the Resisting Destiny. I can see it being cut for extra Cantrips, however this card did come up in some tricky games to give a free large swing when I have spare Energy.

The Game Plan

Your game plan for Black is very simple: You want to play your 4 drop as soon as possible. This card is insanely overtuned, and if you can stick it for a single turn, the game snowballs out of control. For this reason, it is important to pair 4c Goku with 10x Kamehameha to clear cards that pose a threat to him (Pan and Vegito for example). If you can do this, you can back to back 4c Goku, which gives you a free 2 energy and 2 cards every turn, which is completely insane.

Into the mirror, the key cards are Pan, Kakarot, 4c Goku, 10x Kamehameha, and 5c Bardock. Pan allows us to bounce the opponent’s 4c Goku, so if you can set it up on turn 3, you can bounce your Opponent’s Goku while developing your own. The deck struggles to deal with a 2 and a 4 on the same turn, so this spot will generally win you the mirror match. Make sure to KO your opponent’s 3c Bardocks and Pans with 10x Kamehameha before they get out of control. Kakarot allows us to win after losing the dice roll, allowing us to play 4c Goku on t3 going first. The hand disadvantage is worth it, as the person who can stick this card first generally wins the game. Lastly, the only answer we have to 5c bardock is our own, so if you can 5c gap your opponent, you will also be in a commanding position.

Versus blue, the same cards are extremely important. 10c Kamehameha allows you to clear the Opponent’s Vegito, which means they cannot use the 4c Gohan to bottom deck 2 of your 4c Gokus. On top of this, Giru is amazing as it allows you to KO Hercule and Sharpner into Haloku, which reduces their combo potential significantly. Versus red, as stated at the start of the guide, make sure to boost up your key targets with your leader ability plus energy marker. Pushing your Pan and 4c Goku out of range of your opponent’s abilities will stop them from being easy to trade into and stop your opponent from KOing your board, which means you will always be one step ahead. When in doubt and versus anything else, just turbo out 4c Goku, gain extra effects from the energy marker, and you will snowball out of control!

Final Thoughts

Thank you for reading, and thanks once again to my sponsor Eternal Magic and to my testing partners from PX3! Hope you have a good time playing FB03 🙂

[FB03] Ami: Red Beerus Deck Profile in FB03 Raging Roar

Introduction

Hello. I'm Ami from Brunei (Twitter: @KamuiKurohara) . Firstly I want to say thank you for honoring me the opportunity to write an article about my recent achievement which is 1st place in Gamers Tavern Card Shop August 2024 DBSCG Weekly Event. My article is about the deck list, potential changes, and also how to approach the popular matchups.

Deck list:

The idea of this deck can be Aggro & Control, you need to know the right timing to awaken your leader. If you’re against a swarming deck, you need to aggressively taking your life and awaken ASAP so that you can early control your opponent board with the Leader Awaken ability,-10K one of your opponent battle character.

The game plan of using this deck is that to build up your board while clearing opponent board, push your opponent’s life to 2 or 1 and then finish your opponent off with Double Strike Goku or multi swing with your battle characters. Basil FB02-020 searcher is used to help you find pieces either for Removal/Super Combo/Shield/Combo. Always push with Beerus Leader and Caulifla FB02-007 in the early game with the Critical, forcing your opponent for either taking life or guarding!

Core Cards:

 1 Cost Whis:

 -5k power every turn is very strong to stabilize the board.
Green decks often use their searcher on turn 1 going 1st and you can just answer with this. You would want this stay on your field to help reduce the power of cards your opponent battle character. 

 1 Cost Marcarita FB03-022:

I really love this card, giving 1 of your battle card +10K if your leader awakened and can combo with her afterwards. She really help with guarding in the early game and combo during the late game pressuring your opponent.

 2 Cost Caulifla FB02-007:

Aggro in the early game with Critical and help you awaken faster with the on play take life effect. You would want this stay on your field to pressure your opponent reduce cards in their hand or discard their life. 

 4 Cost Kefla FB02-013:

Kefla is stronks. 25K power after leader awakened, draw 1 and play 1 extra body cost 4 below in 1 turn is just too strong.

 3 Cost Katopesla FB02-004:

3 in 1 -5k power every turn is very strong to stabilize the board. You would want this stay on your field to help reduce the power of your opponent battle character while keep swinging with 20K body. 

 3 Cost Android 17 FB02-015:

This card is good right now. Usually by turn 3-4 you would already awaken your leader. This card cannot be KO by opponent Battle Cards Effect. It is good against decks that have a lot of their attackers 20K powers below since your leader gonna be a 25K base power as long android 17 in the field.

5 Cost Rumsshi FB02-029:

 Best big body removal combining with Beerus Leader. -10K power 1 opponent battle card, 30K base power and +10K Combo.

 5 Cost Goku FS01-08:

Your main finisher. Most of the time you will all in pump when your opponent is at 2 lifes. You only need 1 Goku each game so consider charging to energy if you got your 2nd copy. 

Potential substitutes:

2 Cost Fuwa FB01-026:

 You can play 3-4 of Fuwa in place of 2 cost Hit FB01-021 or 3 cost Gohan FB02-018.
I think Fuwa is better as it can help to stabilize the board and your hand. -15K power 1 of opponent battle card and can use it for combo afterwards.

The Game Plan

General Mulligan criteria:

Very simple.
Going first: Whis, Caulifla/Hit, Goku SSB/ Gohan, Katopesla
Going 2nd: Caulifla/Hit, Katopesla, Goku SSB/ Rumsshi

Matchup specifics:

VS Bardock FS05:

Choice: Going 1st  

Black in DBSCG is really interesting, they have the ability like other colours (stun,ramp,bounce etc). Prefer going 2nd with the same mulligan. Try to look for Caulifla so you can go Crits Aggro. Make sure to control their board and force them to use most of the source in their hand. Also when the leader awaken, it can combo with their top deck if the card is <Bardock’s Crew> and it is extremely painful so we want to avoid that by removing source that help them interact with the top deck. When we reach 5 energy, if opponent hand size is low, consider dropping 5 cost Goku double attack to win the game. 

VS Green Gohan FB01-071:

Choice: Going 2nd 

Against Gohan try to look for Hit/ SSB Goku/ Rumsshi in your starting hand just in case they play big body since they can ramp energy faster. During my match I have to really control my opponent board especially when they drop the new Son Gohan: Youth SCR FB03-139, need to prevent them using it ability to gain +20K power during their turn if have 8 or more energy and ramping when attacking.  

VS Green Android 17/18 FB01-070:

Choice: Going 2nd 

Usually in this matchup, you must win within the first 7 turn. Prefer going 2nd with the same mulligan. Try to look for Caulifla so you can go for turn 1 Caulifla, turn 2 Caulifla and swing with multi Crits pressuring them. Do make them stuck at 5 life for 1 turn if their energy will reach 6 the following turn as their 15K base power would need extra effort to touch your battle cards with 20K power base. Try to control their board preventing them to set up. Caulifa/ SSB Goku/ Katopesla/ Rumsshi is the core cards when it’s come facing up Android 17/18. They help you aggro/control while setting up your board.  

Final Thoughts

I hope my explanation would be able to help you in any way. If you like this article, do follow my Twitter/X @KamuiKurohara . I do updates on Digimon/ One piece/ MTG and other as well so do check it out. Among the TCG that I play, DBSCG is the one that I enjoy the most. Love the artwork as well, both normal art and alternate art really looks amazing.

Once again I want to say thank you to TCG Top Decks HQ for giving me to chance to write the article and big shout out to Robin (Twitter @IKI_Azu). I just recently read his article, it help me to tune my Universe 7 Goku deck and can’t wait to try it with new U7 support from FB03.  

Thank you very much for reading this far and I hope you enjoyed reading it!

[FB02] Robin with Red Deck: U7 won Ultimate Battle

Introduction

Hi. I am Robin from Indonesia (tw: @IKI_Azu) .  I have been invited to write an article about my recent achievement which is 1st place in IKI Card shop July Ultimate battle. In this article I will write about the deck list, potential changes, and also how to approach the popular matchups.

Deck list:

I ended up playing this particular list for the Ultimate Battle which was held on Sunday, 7th July 2024. It was still early after the ban list of kefla, master roshi. People are still figuring out how to play the so called Meta 2.5. As I only have a red toolbox, I started testing out a few red lists starting with Beerus leader. I felt like Beerus lacks the punch to finish the game so I went to try SSB Goku, at least it felt like this deck better. In Japan, Android 17 deck was really popular after the ban list and I felt like SSB Goku has better matchup against it than Beerus .

General guideline to play this deck:

The idea of this deck is to be aggressively taking your life and awaken ASAP so that your Universe 7 units will get 5,000 power boost which will easily push your opponent life down to 2. The game plan of using this deck is that to push your opponent’s life to 2 and then finish your opponent off with double strike Goku. Android 18 searcher is used to balance the value so that I won’t run out of hand faster than my opponent. Always push with your 3 cost cards after awakening as they are 30,000 in power and forcing your opponent for a super combo, 2 cards, or taking life. Not to mention you will be ahead of tempo as you are removing your opponent’s cards from their board.

Core cards:

 1 Cost Whis:

-5000 power every turn is very strong to stabilize the board.
Green decks often use their searcher on turn 1 going 1st and you can just answer with this. You would want this stay on your field to reduce the power of cards your opponent plays with power 20,000 power or 25,000. I will talk about this more later on.

 2 Cost Hit:

-5000 power on attack every turn which was explained earlier, just like whiz, you can answer your opponent’s searcher/ mai, etc. ALWAYS drop this on turn 1 going 2nd using your energy marker as opponent usually doesn’t have anything to remove this. If this card survives. It will help to win the board and eventually your opponent needs to throw their hand to kill this.

 4 Cost Kefla:
There is a reason why this card is limited to 1. It is just that strong. 25,000 power after awakening, draw 1, Dropping an extra body in 1 turn is just too strong. I know it is unsearchable, but it helps.

  3 Cost Android 17:

This card is insane right now. Usually by turn 3-4 you would already awaken your leader. This card cannot be KO by opponent BATTLE CARD EFFECTS.  It also helps to tank up the opponent’s 4 cost Android 17/18 which they will swarm a lot of their 20,000 power units. It is good against yellow decks as well because a lot of their attackers are 20,000 powers .       

 3 Cost Blue Goku SR:

Best card in the deck. 30, 000 power after leader awakened.
Able to KO opponent’s board so We will be ahead in tempo.

Consider dropping FB02 SR Gohan first if you need to KO 20,000 power or above with this effect.

 5 cost Goku Double strike:

Your main finisher. Most of the time you will all in pump when your opponent is at 2 lifes. You only need 1 of this each game so consider charging to energy your 2nd copy.

Potential substitutes:

 5 cost Beerus SR

You can play 2 of Beerus SR in place of 4 cost Goku Sec.
I think Beerus is better as it can help to stabilize the board when going 2nd against android and they swarm their field by turn 4.

 4 cost Krillin R


You can play this in place of 2 cost blocker android. Not much difference in my opinion.

You can also play the TOP version of the searcher and the list will look like this.

The Game Plan

General Mulligan criteria:

Very simple.
Going first: whiz, hit, Blue SR Goku/ SR Gohan
Going 2nd: 2 hit, Blue SR Goku/ SR Gohan

Matchup specifics:

 VS Android 17/18:
50:50
choice: going 2nd

Usually in this matchup, you must win within the first 7 turn. Prefer going 2nd with the same mulligan. Try to look for 2 hit. So you can go for turn 1 Hit, turn 2 Hit. Do make them stuck at 5 life for 1 turn if their energy will reach 6 the following turn as their 15,000 base power would need extra effort to touch Hit . Also when they awaken, 30,000 power is extremely painful so We want to avoid that. When we reach 5 energy, if opponent hand size is low, consider dropping 5 cost Goku double attack to win the game. 

 VS Frieza:
Slightly Favorable
Choice: 2nd
Specific mulligan: whiz, Blue Goku SR

Just remove the field and win the board. You win if you win the board.
Don’t let them awaken early. If their unit is 20,000 power and your leader is still at 15,000 in the early game, consider attacking their unit and pump 10,000 to trade hand.

  Mirror Matchup:
Choice: 1st
follow general mulligan.

This matchup is all about tempo. Just drop your characters and don’t attack. Attack their character first and then leader. If your list plays Beerus SR, you can full swing on 4 energy to the enemy leader. Most likely their response is to attack your characters while expanding their board. If that happens, just let your character die and clear their board with Beerus SR effect the following turn.

  VS Trunks Future:
unfavorable.
Choice: 2nd
Specific mulligan: whiz, Blue Goku SR on going 2nd.

The most popular build of trunks is the videl vanilla version. Try to shut down the combo with whiz and Blue Goku SR on going 2nd. Beware of Pilaf loop. Try to pressure them as much as possible so that they can’t loop pilaf.


Final Thoughts

I hope my explanation would be able to help you in any way. If you like this article, do follow my Twitter/X @IKI_Azu. I do updates on One Piece card game as well so do check it out. I will be using this deck more as I have yet to find the best list for SSB Goku.

Thank you very much for reading this far and I hope you enjoyed reading it.